
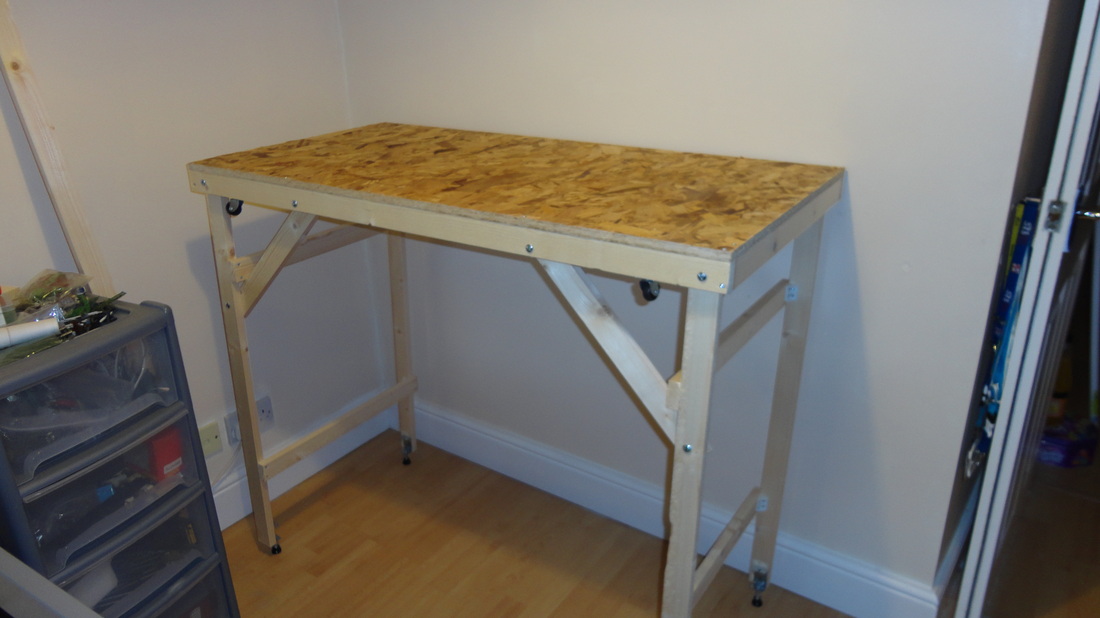
Making a movable layout board.
When I first started making this particular railway I promised myself that I would make this one easily transportable. This was because the two other layouts I have made in the past were both fixed in place and in order for me to move them I had to break them apart and start again. Having a fixed model was fine when I just wanted to have it in the corner of my house, but if I need extra room, or want to show at an exhibition I really need to be able to collapse the model down for transportation or to stow away.
So I decided to build this model in sections, each being 4ft by 2ft with removable legs and with the addition of small wheels at each corner in order to allow underbed storage.
When I started this model 2 years ago I designed and built the first two layout boards without documenting it with photographs, but this time as I build the third section I have.
Materials:
7 x Sawn Kiln Dried Timber (L)1800 x (W)50 x (T)22mm lengths for bracing the top, legs, joists and batterns.
1 x Oriented Strand Board Exterior (L)1220 x (W)607 x (T)15mm (4ft x 2ft).
8 x rigid joints.
4 x screw on cabinet wheels.
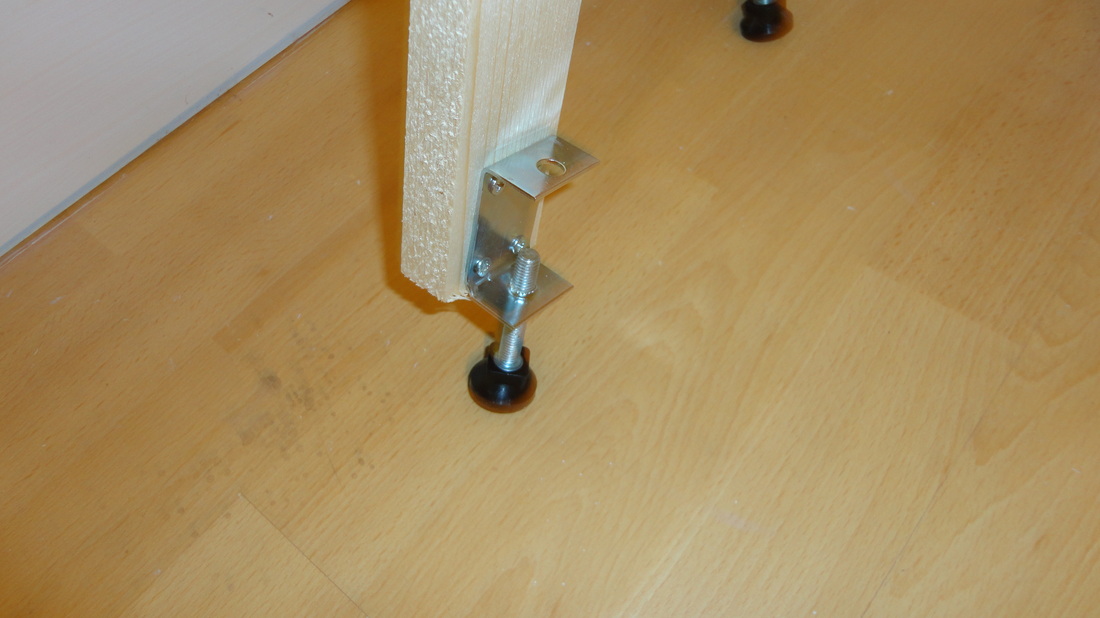
4 x screw on adjustable screw leg ends.
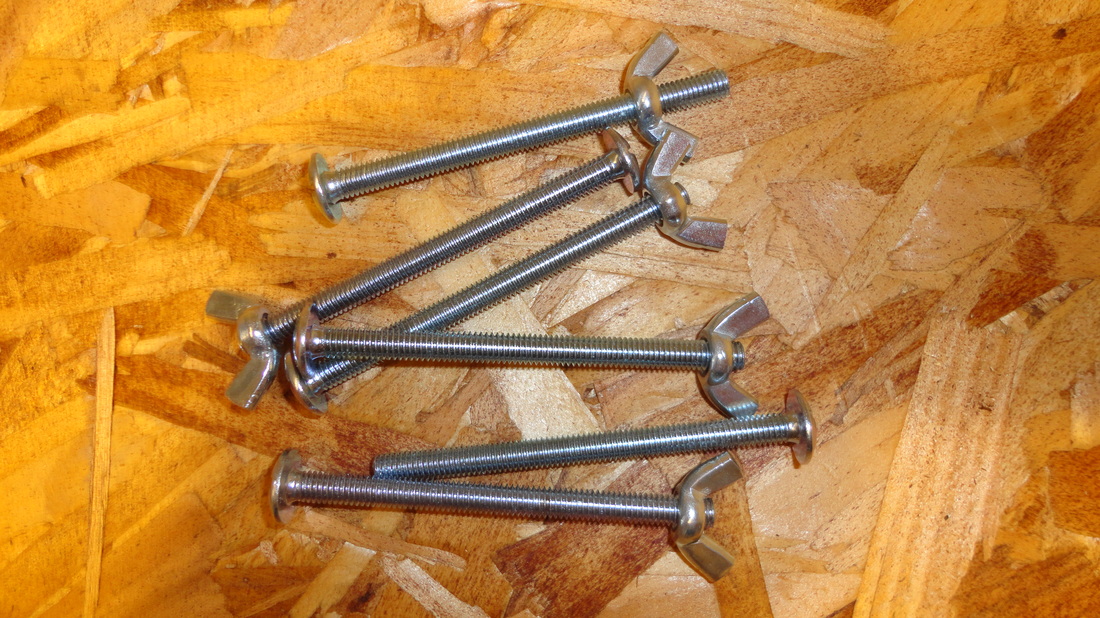
8 x M6 80mm roofing bolts with mushroom heads.
8 x M6 wingnuts
6g of 20mm twinthread zinc plater screws.
6g of 50mm twinthread zinc plater screws.
All these compoinents came to less that £35 and it creates a very sturdy base board.
Instructions.
First of you will need to cut 2 x 4ft lengths and 2 x 23 inch lengths of the (W)50 x (T)22mm timber to battern the edge of the underside of the OSB (Oriented Strand Board), you should be able to do this out of two 1.8 metre lengths.
Attach these to the OSB from the top using the 50mm screws (two in each corner and one in the middle of each length should do it).
Cut 4 x 1 metre lengths of the (W)50 x (T)22mm timber for the legs (Saving the left over 800 mm of each for the struts across the legs and the leg braces).
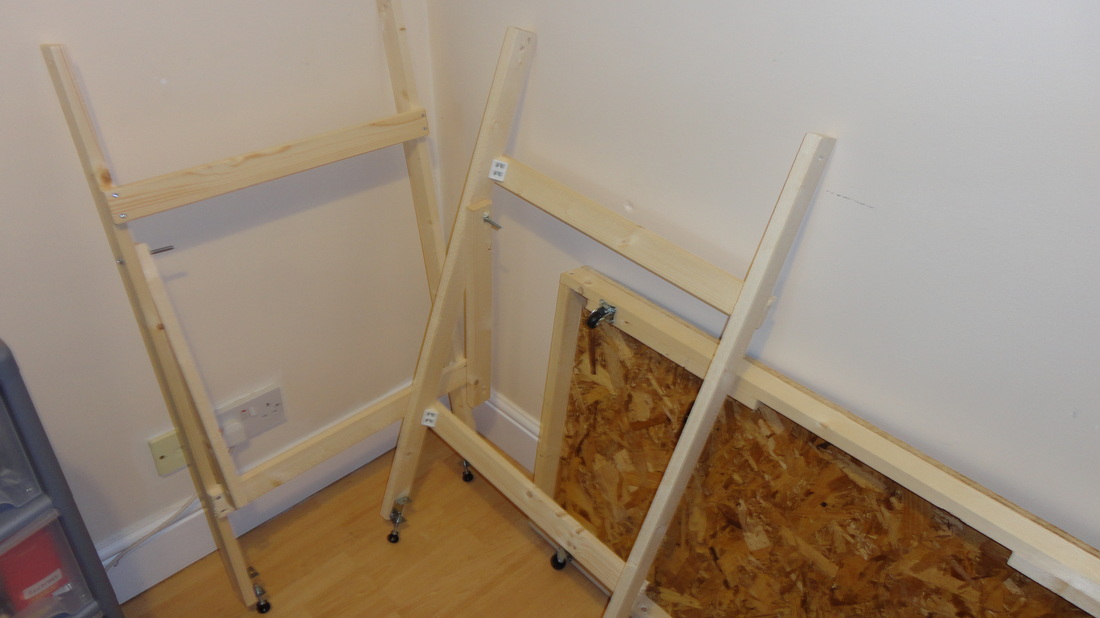
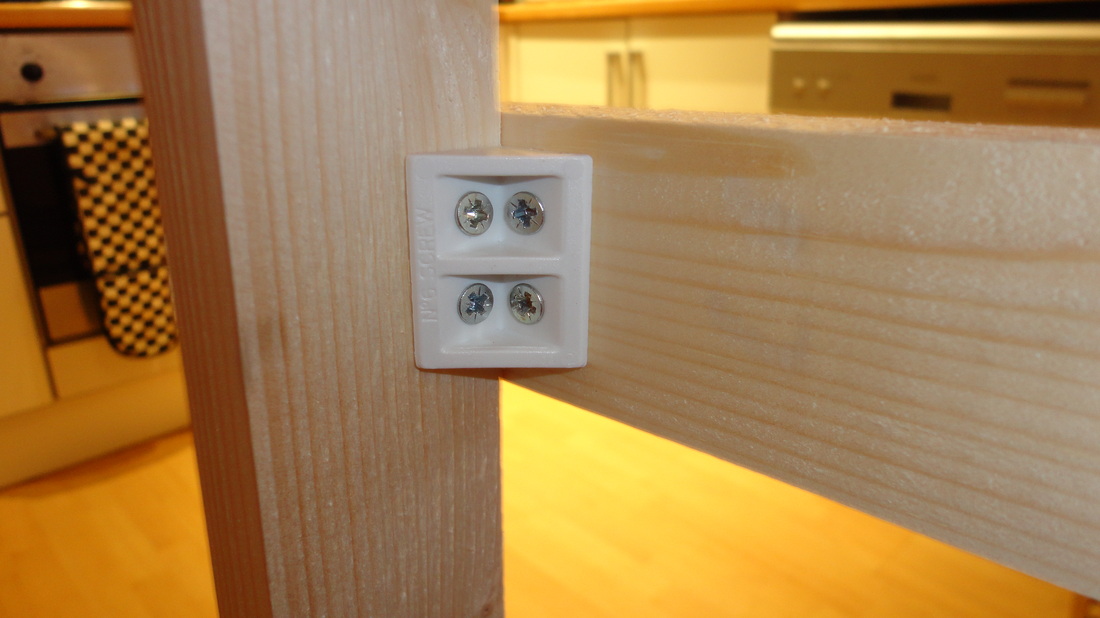
Using 2 x two ft lengths of the (W)50 x (T)22mm timber and 2 of the 1 metre lengths to form a "H" frame with a double cross like the ones in the first picture 1 below, and double strengthern them by attaching rigid joints in picture 2. (Make two of these)
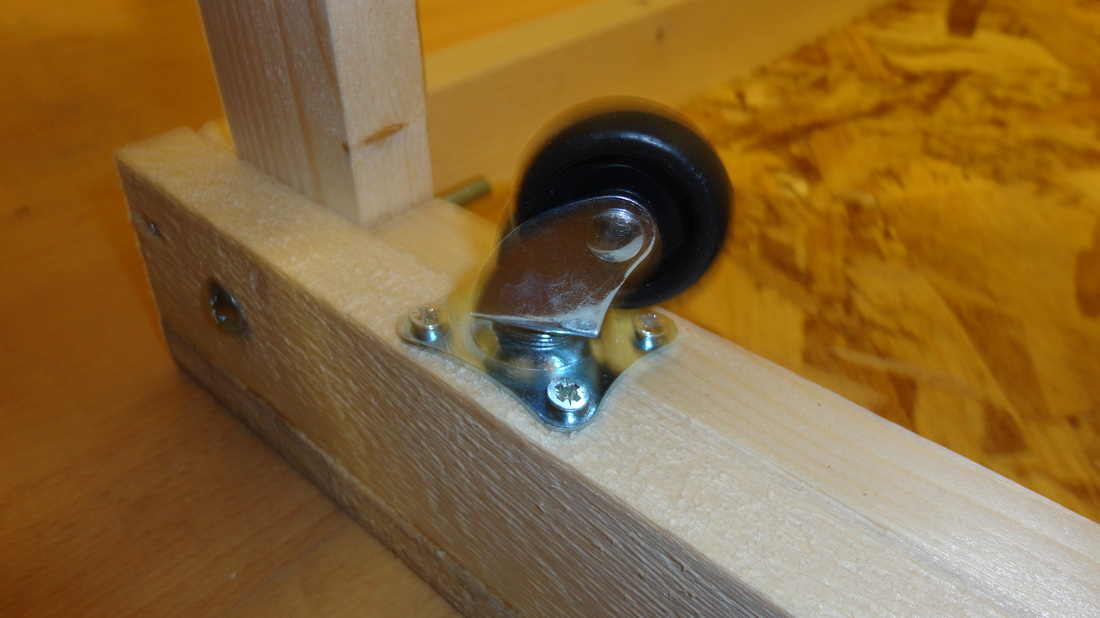
I added the cabinet wheels at this point, but they are not essential. (pic 3)
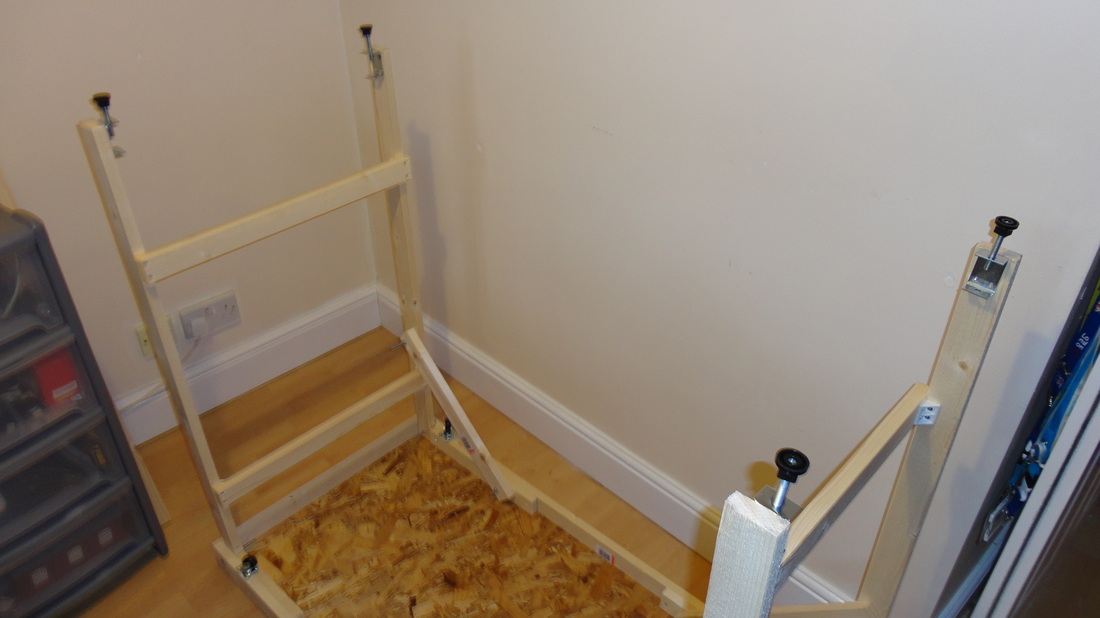
Turn the base board on it's back so you can see the underside and test fit one of the legs at the end.
If they fit accurately, use an offcut of battern wood to butt up against the leg and screw in to place (do not screw to the leg as these need to be removable). Repeat the process 3 more times for each leg. Now turn the table right side up.
The table would actually be quite sturdy as it is, but I like to add a bolting system as over time the wood may warp and not be as tight, leaving the table to become unstable.
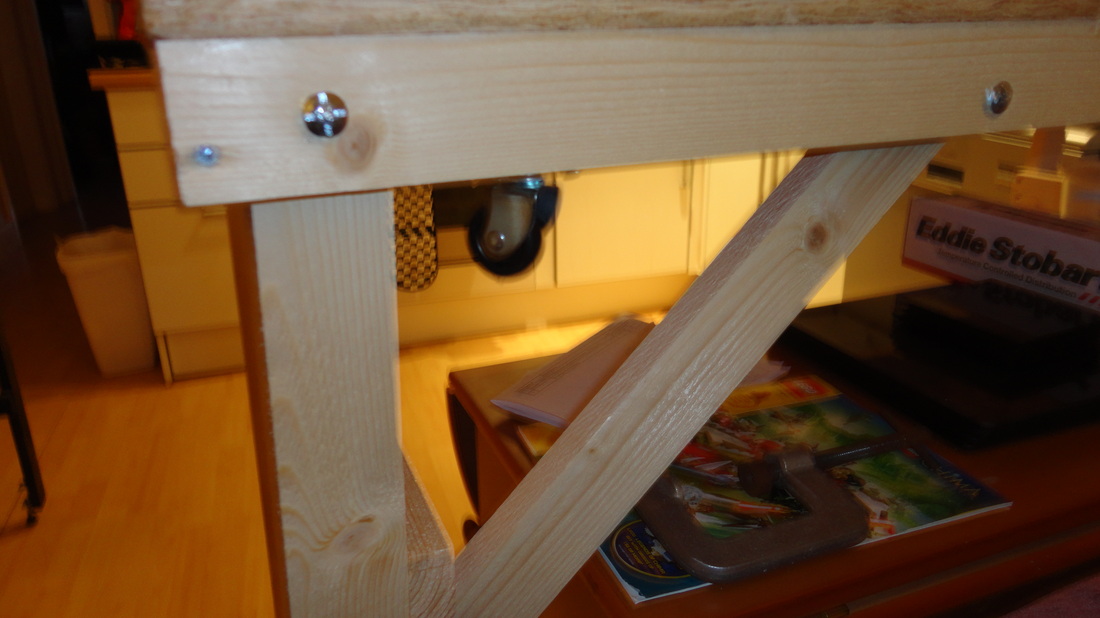
8, 80mm bolts and wingnuts. Drill 8-10mm holes in each corner through the baseboard and top of the legs to house four of the bolts, drill two more holes for the leg braces (pic 6) and cut a length of battern that is about 15 inches to form a swinging trangle frame support.
Lastly attach the adjustable leg screws.
So I decided to build this model in sections, each being 4ft by 2ft with removable legs and with the addition of small wheels at each corner in order to allow underbed storage.
When I started this model 2 years ago I designed and built the first two layout boards without documenting it with photographs, but this time as I build the third section I have.
Materials:
7 x Sawn Kiln Dried Timber (L)1800 x (W)50 x (T)22mm lengths for bracing the top, legs, joists and batterns.
1 x Oriented Strand Board Exterior (L)1220 x (W)607 x (T)15mm (4ft x 2ft).
8 x rigid joints.
4 x screw on cabinet wheels.
4 x screw on adjustable screw leg ends.
8 x M6 80mm roofing bolts with mushroom heads.
8 x M6 wingnuts
6g of 20mm twinthread zinc plater screws.
6g of 50mm twinthread zinc plater screws.
All these compoinents came to less that £35 and it creates a very sturdy base board.
Instructions.
First of you will need to cut 2 x 4ft lengths and 2 x 23 inch lengths of the (W)50 x (T)22mm timber to battern the edge of the underside of the OSB (Oriented Strand Board), you should be able to do this out of two 1.8 metre lengths.
Attach these to the OSB from the top using the 50mm screws (two in each corner and one in the middle of each length should do it).
Cut 4 x 1 metre lengths of the (W)50 x (T)22mm timber for the legs (Saving the left over 800 mm of each for the struts across the legs and the leg braces).
Using 2 x two ft lengths of the (W)50 x (T)22mm timber and 2 of the 1 metre lengths to form a "H" frame with a double cross like the ones in the first picture 1 below, and double strengthern them by attaching rigid joints in picture 2. (Make two of these)
I added the cabinet wheels at this point, but they are not essential. (pic 3)
Turn the base board on it's back so you can see the underside and test fit one of the legs at the end.
If they fit accurately, use an offcut of battern wood to butt up against the leg and screw in to place (do not screw to the leg as these need to be removable). Repeat the process 3 more times for each leg. Now turn the table right side up.
The table would actually be quite sturdy as it is, but I like to add a bolting system as over time the wood may warp and not be as tight, leaving the table to become unstable.
8, 80mm bolts and wingnuts. Drill 8-10mm holes in each corner through the baseboard and top of the legs to house four of the bolts, drill two more holes for the leg braces (pic 6) and cut a length of battern that is about 15 inches to form a swinging trangle frame support.
Lastly attach the adjustable leg screws.
|
1
3
5
|
2
4
6
|
7
|
8
|
|
|